
Once upon a time,
 long before digital cameras and programmed modes, there was manual mode. In those days it wasn’t called “manual mode,” because there were no other modes. It was just photography. In fact, many photographers, including me, cut their teeth on completely manual cameras. Let’s face it—if you want to learn the effects of aperture and shutter speed on your photography, there is no better way to learn than by setting these adjustments yourself. But today, with the advancement of camera technology, many new photographers never give this mode a second thought. That’s truly a shame, as not only is it an excellent way to learn your photography basics, it’s also an essential tool to have in your photographic bag of tricks.
When you have your camera set to Manual (M) mode,
 the camera meter will give you a reading of the scene you are photographing. It’s your job, though, to set both the f-stop (aperture) and the shutter speed to achieve a correct exposure. If you need a faster shutter speed, you will have to make the reciprocal change to your f-stop. Using any other mode, such as S or A, would mean that you just have to worry about one of these changes, but Manual mode means you have to do it all yourself. This can be a little challenging at first, but after a while you will have a complete understanding of how each change affects your exposure, which will, in turn, improve the way that you use the other modes.
Setting up and shooting in Manual mode

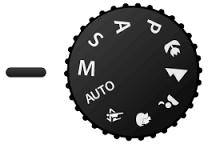
- Turn the Mode dial to align the M with the indicator line.
- Select your ISO by pressing the right side of the Control wheel (next to where it reads ISO), rotating the Control wheel to the desired setting, and pressing the middle of the wheel to select (the ISO selection will appear in the electronic viewfinder and the rear LCD panel).
- Point the camera at your subject, and then activate the camera meter by depressing the shutter button halfway.
- View the exposure information in the electronic viewfinder or on the rear display.
- While the meter is activated, use your thumb to roll the Control wheel left and right to change your shutter speed value until the exposure mark is lined up with the zero mark. The exposure information is displayed by a scale with marks that run from –2 to +2 stops. (You’ll note that –3 and +3 are grayed out. They represent the range of exposure compensation available for S and A modes.
- In M mode, you can forget about –3 and +3.) A “proper” exposure will line up with the arrow mark in the middle. As the indicator moves to the left, it is a sign that you will be underexposing (there is not enough light hitting the sensor to provide adequate exposure). Move the indicator to the right and you will be providing more exposure than the camera meter calls for; this is overexposure.
- To set your exposure using the aperture, depress the shutter release button until the meter is activated. Then, using your thumb, turn the Control dial right for a smaller aperture (large f-stop number) or left for a larger aperture (small f-stop number).


No Comment